Mango sticky rice is a delicious Thai dessert and surprisingly easy to make at home.
Whether you have a rice cooker or not, you’ll be able to make Thai sticky rice with mango that tastes just as good as an authentic Thai restaurant. If you like coconut and mango, give this simple recipe a try for a warm and delicious dessert.
Every time I’d go to a Thai restaurant, I’d always choose the sticky rice as a dessert because I figured I’d never be able to make it on my own to taste as good.
On my first attempt at making sticky rice at home, it was as good as my local Thai restaurant. That’s how easy it is to make an authentic sticky rice dessert.
The recipe covered in this guide tastes everything I’ve learned from making Thai sticky rice and explains how to make it with whatever equipment you have at home.
What is Thai sticky rice?
The key ingredient in this recipe is sticky rice, which is also known as Glutinous rice, sweet rice, or waxy rice. The word ‘Glutinous’ means it is glue-like or sticky, it doesn’t mean the rice contains gluten (it doesn’t contain any gluten).
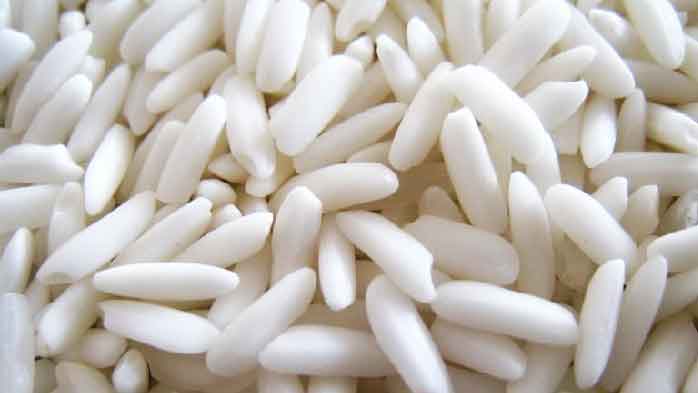
Sticky rice is a short-grain rice, but not all short-grain rice are sticky rice. I’ve seen some people complain about getting poor results when they followed a sticky rice recipe and the most likely reason is not using proper Glutinous rice.
What makes Glutinous rice different than regular white rice such as Jasmine is the levels of Amylose and Amylopectin, which are the two components of starch. Glutinous rice has levels of Amylopectin far higher than other rice and almost no Amylose.
When hot water comes into contact with Amylopectin, the starch molecules separate and we end up with sticky and fluffy rice.
While it’s possible to make this recipe using normal white rice, it won’t taste anywhere near what it tastes like with Glutinous rice.
How to tell sticky rice and normal rice apart
The cooked sticky rice you get in Thai restaurants is translucent but when you buy it from your supermarket, it will likely be fully opaque. If you compare glutinous rice to normal white rice, it’ll be easy to tell them apart. Normal rice will be slightly translucent while glutinous rice will be fully opaque.
When normal rice is cooked, it turns from translucent to white. When sticky rice is properly cooked, it turns from opaque to translucent.
How to Prepare Sticky Rice
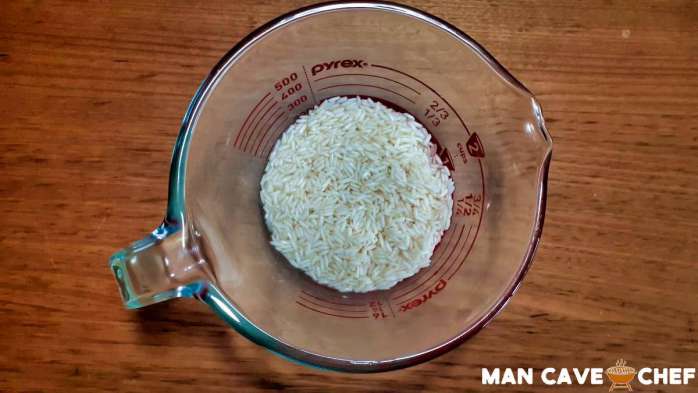
Step 1: Clean and Soak the rice
Before we can steam the sticky rice, we need to prepare it. Sticky rice has a hard and opaque surface and to get the best results we need to work on it.
Add 1 cup of glutinous rice to a small bowl:
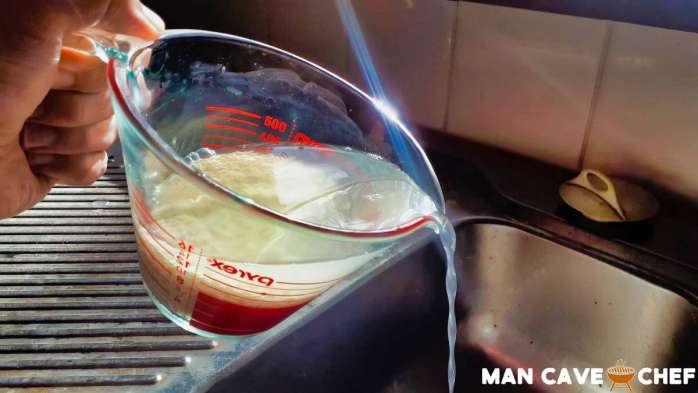
Now completely submerge the rice in tap water:
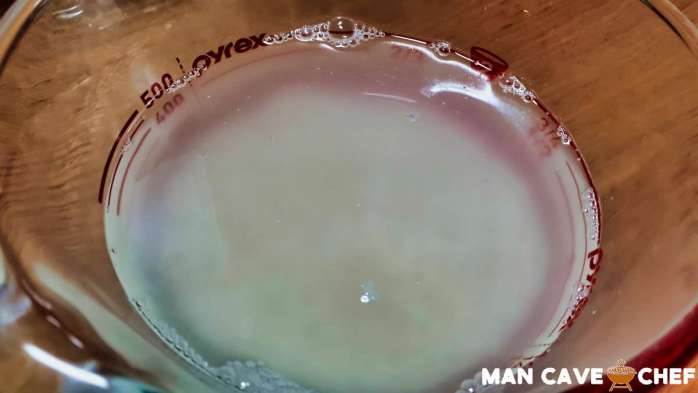
You’ll notice that the water immediately starts to turn cloudy. This is due to the water breaking down the hard white coat on the rice.
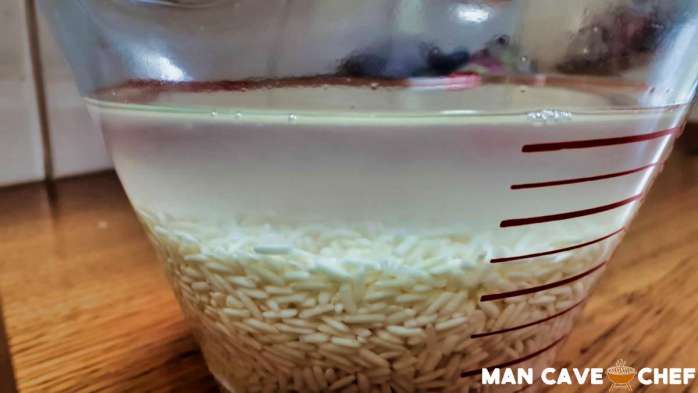
Take a spoon and stir up the rice. Here’s what the water looked like after 10 seconds of stirring:
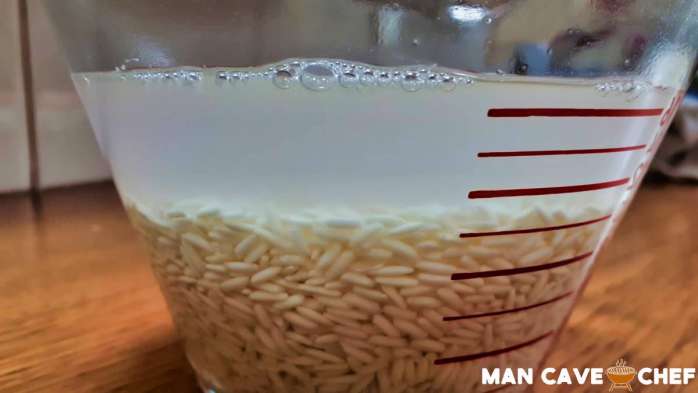
After you have stirred the rice and the water is cloudy like in the above photo, drain the water:
The water will only ‘extract’ a limited amount of the rice’s coating, so we need to repeat this process several times to get the best results.
Submerge the rice in water again and use your spoon to stir the rice.
Repeat this at least 10 times. The more times you repeat this process, the better.
Here is what the water looked like on this rice after stirring and draining it ten times:
You can see that it’s still a bit cloudy, but it’s significantly better than the earlier photos (the difference is bigger in person).
Once the water is fairly clear, set the rice aside to soak in the water for at least 3-4 hours. You may get the best results when you soak the rice overnight.
Why ‘cleaning’ the rice is important
You might notice that many other recipes don’t follow this method and they only soak the rice.
While soaking the rice will remove some of the coatings, it won’t remove anywhere as much as you can remove by following the above steps.
I compared both methods (washing vs not washing the rice) and it was clear that taking the time to thoroughly wash the rice before soaking produced far better results.
I even found that by washing the rice thoroughly, I only needed to soak the rice for 3 hours and still achieved as good results as soaking overnight.
So if you don’t want to worry about soaking overnight, thoroughly wash the rice before soaking for 3 hours.
Step 2: Steam the rice
Even if you usually boil regular white rice, you’ll get the best results if you steam sticky rice. I’ve tried boiling sticky rice and it turned into a mushy mess.
There are a few ways you can steam your sticky rice depending on what equipment you have.
The best way is with a rice cooker:
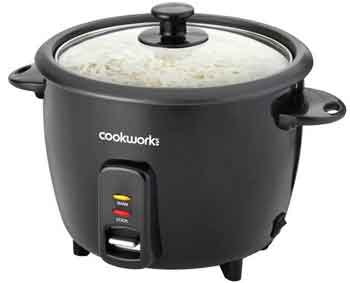
You simply add the drained rice from step 1 into the rice cooker and let it do its thing. It’s a foolproof method that produces consistent results.
If you don’t have a rice cooker, the next best option is a rice steamer basket. Here are two examples of typical baskets:
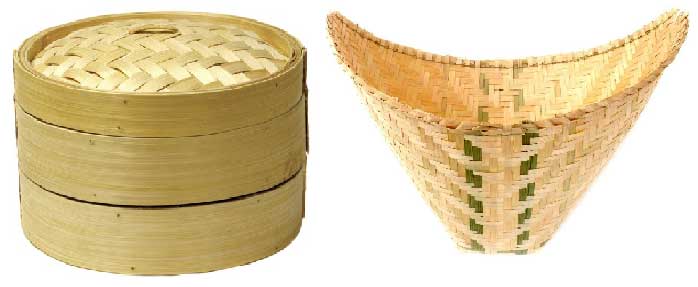
The basket on the right is a traditional sticky rice steamer basket. If you go to Thailand and see sticky rice prepared, you’ll likely see them using this type of basket.
If you don’t have a rice cooker or a rice steamer basket, you’ll probably have a typical stainless-steel steamer pot like this one:

While these are great for steaming many things, the large holes aren’t ideal for short grain rice like sticky rice. As the rice expands, they will clog up the holes.
Fortunately, there’s an easy solution:
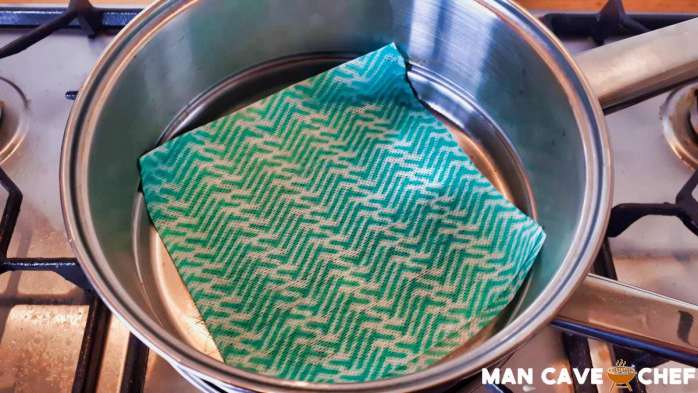
Any type of loosely-woven gauze-like material such as cheesecloth will work perfectly fine at letting the steam reach the rice while preventing the rice from clogging up the holes.
Simply cover all the holes with a breathable barrier, then add the rice on top:
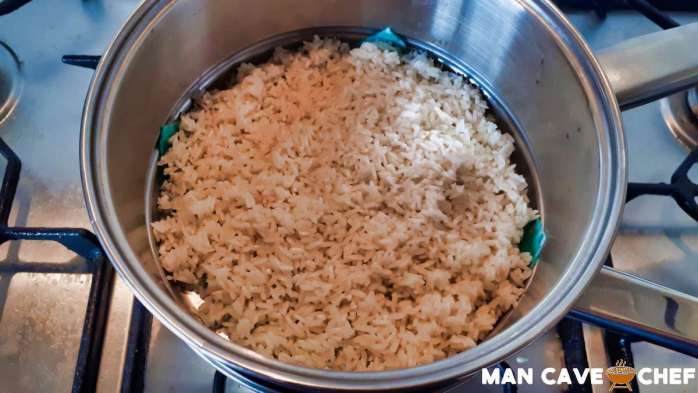
It should only take around 30 minutes to thoroughly steam sticky rice.
Be careful you don’t steam them for too long. While delicate and fluffy sticky rice is great on its own, when you add the coconut sauce it will turn the rice into a mushy mess. So don’t overdo the steaming.
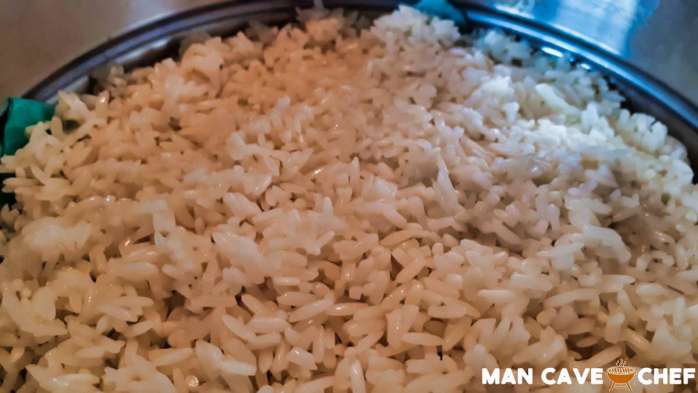
In the above photo, you may be able to see that the rice are quite translucent and fluffy.
Step 3: Prepare the coconut sauce
You get the best results by serving while the rice is still warm. So start preparing the coconut sauce towards the end of steaming the rice. It only takes around 3 minutes to prepare the sauce, so you can do it when the rice is almost done.
Pour a 400ml can of unsweetened coconut milk into a saucepan and bring to a gentle simmer.
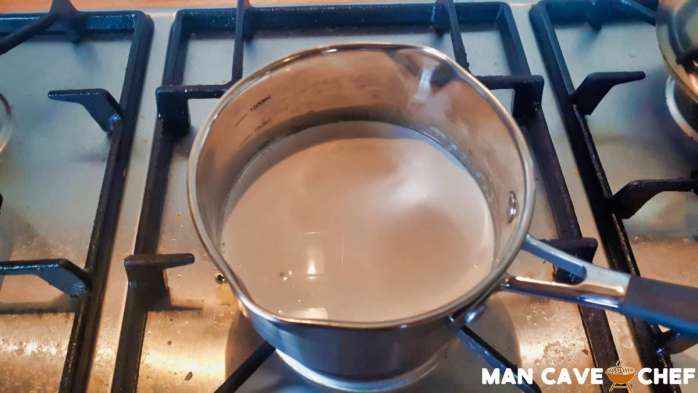
The purpose of heating the coconut milk up is to dissolve two tablespoons of sugar and a pinch of salt, so use a very gentle heat (you should barely see any bubbles like in the below photo).
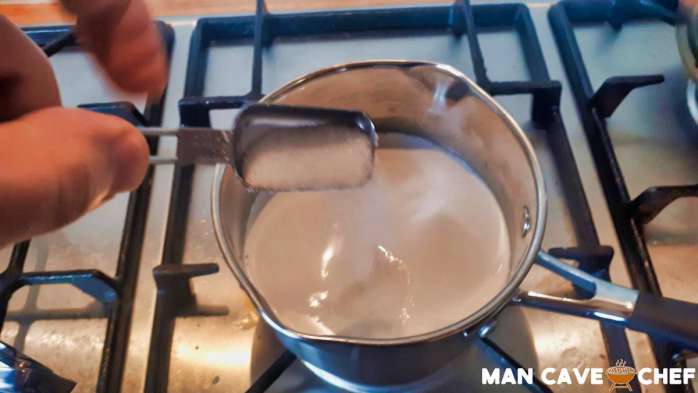
Only heat the coconut milk enough to dissolve the sugar, you don’t want to push it towards boiling.
I’ve seen other recipes use significantly more sugar than what I’ve suggested. I recommend first starting with two tablespoons, then taste the sauce to see if you like how sweet it is. I found that two tablespoons were more than enough, but you may prefer something sweeter.
If you taste the sauce and you want it sweeter, dissolve one tablespoon of sugar at a time and taste along the way. Once you’re happy with the sweetness of the sauce, consider whether you should add another pinch of salt to balance it out or not.
This is a smarter approach than adding in 1/2 a cup of sugar (like a couple of other recipes suggest) only to find the sauce becomes sickeningly sweet.
Step 4: Mix the rice and sauce
Remove the sticky rice from your rice cooker or steamer and place it in a bowl:
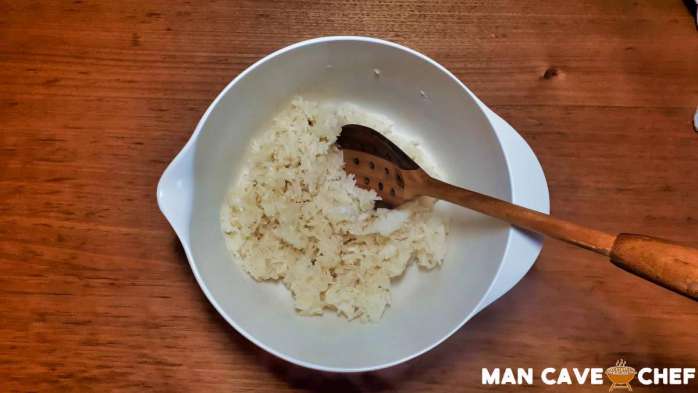
As you would expect, the rice is very sticky at this point and easily clump together.
Pour a small amount of the coconut sauce into the rice:
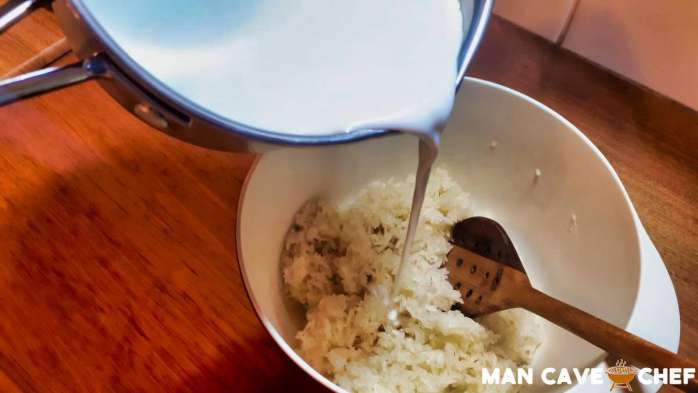
Stir the rice to mix the sauce in. You only want to add a small amount of sauce at a time because we’re trying to avoid completely saturating the rice.
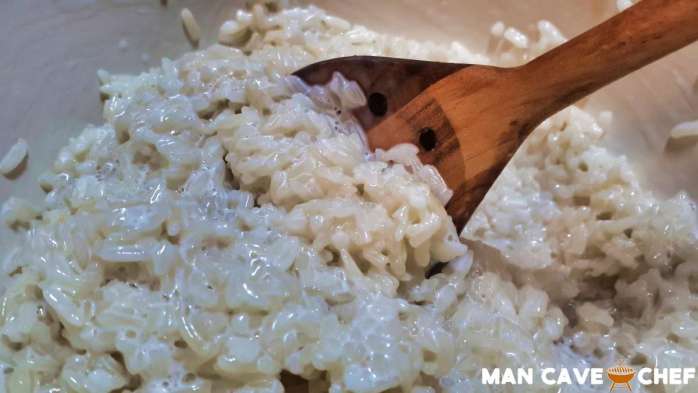
Gradually add more sauce and mix the rice until you reach a consistency you’re happy with.
Some people like their rice swimming in the coconut sauce while others prefer the rice to keep their sticky quality. So gradually add coconut milk in small amounts so you can judge how much is ideal for you.
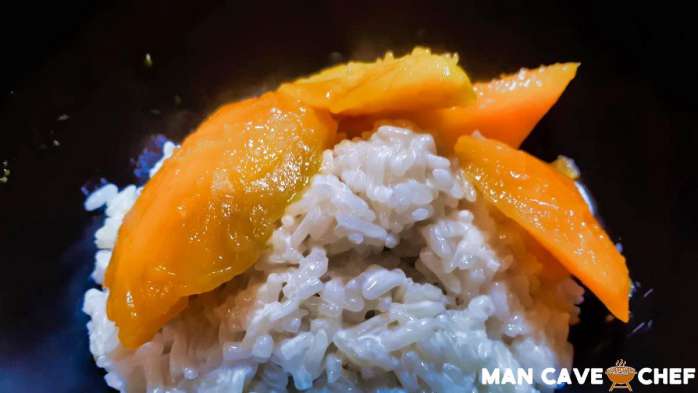
Here is what my sticky rice looked like with a coconut sauce level that covered all the rice, but didn’t pool up or drown them:
Remember you can always add more of the coconut sauce in later when you serve, so don’t overdo it at this stage.
Step 5: Add toppings and serve
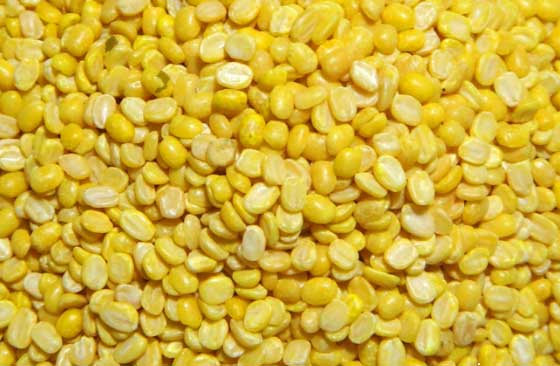
The authentic way of serving sweet sticky rice is with mango and yellow mung beans.
You probably don’t need a photo to know what a mango looks like, so here’s what yellow mung beans look like:
While mung beans are traditionally used, I prefer the simple mango and coconut flavor without them. So I simply cut up a fresh mango (homegrown in this photo) into large slices and add the rice and mango to a bowl:
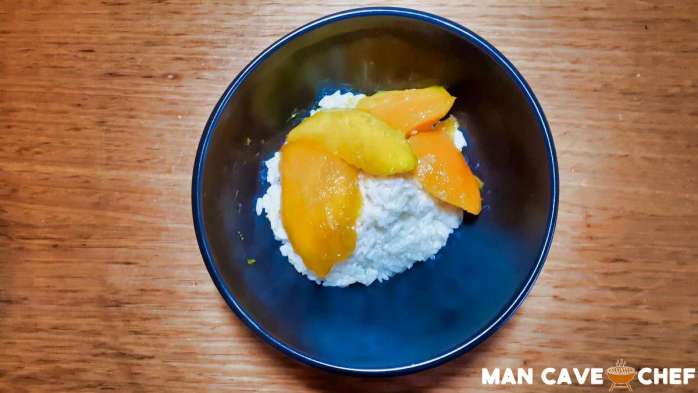
You can add more of the coconut sauce on top of the mango if you want or add other optional toppings such as sesame seeds.
Ideas to try out
This is an incredibly simple dessert to make and because it uses so few ingredients, there is plenty of opportunities to experiment. Try some of these ideas for a different spin on the traditional mango sticky rice.
Sesame seeds
While the authentic topping is to use yellow mung beans, toasted sesame seeds work extremely well with the coconut and mango.
Toasted coconut
Adding toasted coconut chips, slices or flakes on top works well because it adds a different texture to the dish. The rice and mango are both soft, so adding some toasted flakes or chips of coconut adds something a bit more solid or crunchy.
The toasted flavor of the coconut also adds something interesting to the coconut flavor of the sauce.
Papaya or other fruits
While mango is the traditional choice with coconut sticky rice, you may find that other fruits work just as well.
Papaya is a great substitute for mango – especially if you caramelize it.
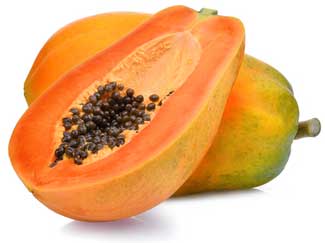
Papaya sticky rice may not be anywhere as common as mango sticky rice, but I highly recommend trying it.
Printable Sticky Rice Recipe Card
You can print this recipe card for a quick reference for the next time you want to make sticky rice.
I recommend printing this card out and making notes on the page if you make any alterations (eg: if you add more sugar). This is a good way to learn from every time you cook something.
Easy Mango Sticky Rice
Ingredients
- 400ml Can Unsweetened Coconut Milk
- 1 cup Glutinous Rice
- 2 tablespoons White Sugar
- Pinch of Salt
- 1 Large Mango
- 1 Tablespoon Yellow Mung Beans (optional)
Instructions
Prepare Sticky Rice
- Add rice to bowl and submerge in water
- Stir rice for 10-20 seconds then drain water
- Repeatedly add water, stir, then drain until water is clear
- Let rice to soak for at least 3 hours (or overnight)
Cook Rice
- Drain rice and add to cooker or steamer
- Steam for 30-40 minutes
Prepare Sauce & Serve
- Add can of coconut milk to saucepan and gently simmer
- Dissolve sugar and salt then taste
- Add additional sugar if required
- Turn heat off sauce once sugar is dissolved
- Place sticky rice in bowl and gradually stir in sauce
- Cut up mango as you like and serve in bowl with any optional toppings
Notes
Sesame seeds or toasted coconut chips/flakes are an excellent topping instead of the traditional yellow mung beans.
Try this recipe with papaya instead of mango for an interesting alternative.
Nutrition Information:
Yield: 4 Serving Size: 1Amount Per Serving: Calories: 139Total Fat: 2gSaturated Fat: 2gTrans Fat: 0gUnsaturated Fat: 0gCholesterol: 0mgSodium: 41mgCarbohydrates: 29gFiber: 2gSugar: 18gProtein: 2g
Sweet Sticky Rice FAQs
Here are some common questions asked about sticky rice that weren’t answered in the above recipe.
Is sweet rice the same as sticky rice?
Yes. Glutinous rice has a few common names including sticky rice, sweet rice, and waxy rice. The size and color of the grains can vary, but the important point is the type of starch it contains.
Sweet or sticky rice has high levels of Amylopectin and has low levels or no levels of Amylose. This is what makes sticky rice different than regular rice.
How do you make sticky rice with regular rice?
Asking how to make sticky rice with regular rice is like asking how to make Coco Pops (or Cocoa Krispies or Choco Krispies depending on where you’re from) using Rice Bubbles (or Rice Krispies). Sure you might be able to add cocoa powder to Rice Bubbles and get a similar looking result, but it’s just not going to be the same as Coco Pops.
It’s the same with sticky rice. While it is possible to follow this recipe using regular rice such as Jasmine Rice, it won’t achieve the same results. You can give it a go, but don’t expect great results.
What makes this dessert so good is the way the special type of rice it uses (Glutinous rice) holds together and tastes.
Can I substitute sushi rice for sticky rice?
No, sushi rice is not a good substitute for sticky rice. There is no good substitute for sticky rice.
The confusion most people have is with the name ‘sticky’ rice. Just because other types of rice can be very sticky (like sushi rice), it doesn’t mean you can substitute one type for another.
If you make this recipe using sushi rice, you’re going to be disappointed with the results.
How do you reheat mango sticky rice?
Reheating sticky rice is difficult to get right. If you use a microwave, you’re more than likely going to end up with a mushy mess.
If you use a microwave, try to break the rice up and splash a small amount of water over the rice. Cover the dish while reheating to try and recreate a steaming environment.
I’ve achieved better results by re-steaming the rice. It still wasn’t as good as freshly prepared sticky rice, but it was far better than using a microwave. The obvious downside is that it’s far quicker and easier to use a microwave.
Don’t expect great results when trying to reheat sticky rice with any method.
How long can sticky rice sit out?
Avoid keeping your cooked sticky rice out at room temperature for over two hours. Bacteria doubles at room temperature roughly every 20 minutes, so in two hours the bacteria levels start to spiral out of control.
Either keep the rice hot before you serve it, or place it in the fridge or freezer to use another time.
The less time sticky rice sits in room temperature the better.