Poached eggs are a crowd-pleaser and can be served in a number of interesting ways.
The problem is there is a lot of misinformation and myths surrounding poached eggs and how to prepare them.
Every person seems to have different ideas on what needs to be done to prepare the perfect poached egg.
In this guide, you will learn:
- Different methods of poaching eggs and how they compare
- What really matters when poaching eggs
- A foolproof way to prepare poached eggs
After reading through this guide, you will have the confidence to prepare perfectly poached eggs whenever you want.
Poached Eggs and Vinegar
The biggest issue I see online over poached eggs is confusion over whether you should use vinegar or not.
You will see some big-name chefs add vinegar to the water while other chefs say it’s a waste of time. This happens a lot in cooking, so let’s look at the science to find out what really matters.
Why do people use vinegar to poach eggs?
The idea is that adding vinegar into the water (or anything else acidic such as lemon juice) reduces the pH and lowers the temperature required for the egg whites to coagulate.
In plain English, this simply means that vinegar in the water is meant to help your egg whites set.
While this sounds like a good thing, let’s look at how poached eggs cook.
Poached eggs cook from the outside-in. This means that the egg whites cook earlier than the yolks. So why would you want to add vinegar to help them coagulate when they’re the first thing to cook anyway?
In fact, adding vinegar makes it more likely that the egg whites will overcook.
If you’ve ever ended up with rubbery poached eggs, you can probably blame the vinegar.
The side-effect of adding vinegar to the water is that it gives your poached eggs a vinegar taste. Some people like this, while others don’t.
If you add vinegar to the water because you like the taste of vinegar in your poached eggs, then by all means continue. Otherwise, there’s really no need to add vinegar.
Key lesson: only add vinegar to the water if you like the taste it gives your eggs.
What Matters When Poaching Eggs
Before we look at poaching methods, let’s start by looking at what really matters when poaching eggs. If you can follow the below tips, you’ll find it much easier to perfectly poach your eggs.
Fresher eggs are best
If you only follow one tip from this guide, follow this one. Fresher eggs produce far better results than older eggs.
Fresh egg whites hold together well, which is crucial when trying to poach them.
Old eggs have weaker whites that can easily break apart and cause a mess when trying to poach them.
If you find that your eggs instantly disintegrate as you add them to the water, you’re probably using old eggs.
The right temperature
If the temperature of the water is too high, the bubbles will agitate the eggs too much and can cause issues.
Not only will the water agitate the eggs and can cause them to break apart, but a higher temperature also causes the eggs to cook faster.
The faster your eggs cook, the smaller timeframe you have to remove them at just the right time. Overcooking your poached eggs is ridiculously easy if the temperature is too high.
Aim for a sub-simmer where the water is fairly still. The lower temperature does mean the eggs will take longer to cook, but that gives you a nice margin of error.
The below photo shows what water looks like at a sub-simmer (below 195°F / 90°C). The water is starting to gently move around and little bubbles form on the surface of the pot:
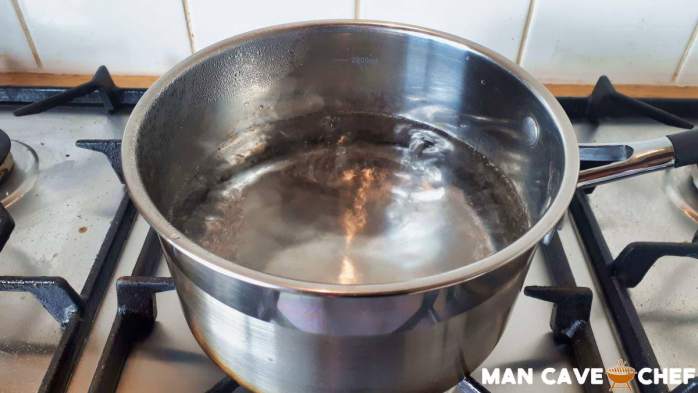
The water at this temperature is nice and gentle on the eggs. This prevents them from breaking apart, but at this temperature, the eggs will cook unnecessarily slow.
Water starts to simmer at around 195°F (90°C). As you raise the temperature past this point, you’ll start to see bubbled breaking at the surface and much more water movement.
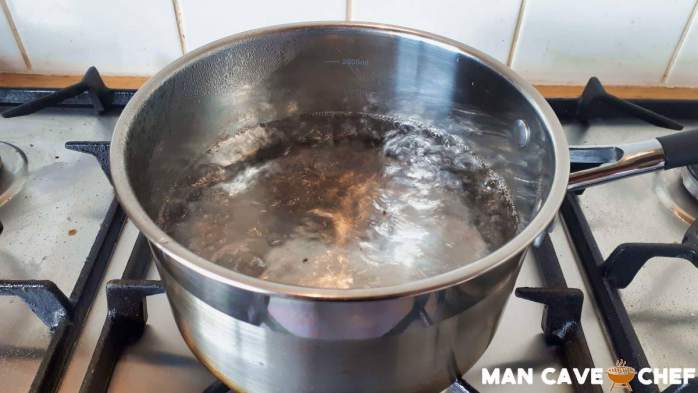
At this temperature, the eggs will cook faster, but they will also get agitated by the water. This makes it more likely that you end up with misshapen poached eggs.
At you bring the temperature closer to a boil (212°F / 100°C), you will see larger and more regular bubbles, much more water movement, and more steam.
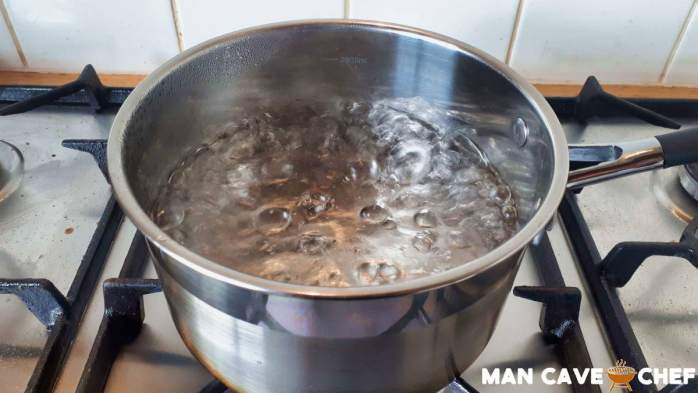
Trying to cook poached eggs in water like this is asking for trouble. The water will agitate the eggs too much and the high temperature will cook the eggs so fast that it becomes hard to judge when they need to be taken out.
This is why a sub-simmer is the best temperature range to poach eggs. The lower temperature takes longer to cook the eggs, which gives you a wider margin of error to play with.
A lot of water
When you add an egg to the water, the temperature of the egg will cool the water down.
This can cause problems – especially if you’re planning on poaching multiple eggs at the same time. You’re likely to find that the water suddenly drops significantly in temperature and throws off your timing.
This issue can be prevented by using a lot of water. The more water you have, the less of a difference the temperature of the egg will make on the temperature of the water.
Imagine dropping an ice cube into a mug of hot water. That ice cube will quickly lower the temperature of the water.
Now imagine dropping an ice cube into a large pot of hot water. That ice cube will melt away and barely affect the overall temperature of the water.
It’s the same with our eggs. More water means less of an impact the eggs will make to the water temperature.
Use at least 3 Litres (3 quarts) of water as a minimum for one egg. If you’re planning on poaching a large number of eggs, use a large and wide pot so you can fill it with a lot of water.
It’s also a good idea to let the egg reach room temperature before you add them to the water.
Paper toweling
Poached eggs are great one toast whether on their own, with bacon, or as eggs Benedict.
One thing that can quickly ruin poached eggs on toast is excess water on the eggs. Soggy toast sucks.
When you remove your eggs from the water, before you place them on your toast, let them rest on paper toweling to soak up the excess water.
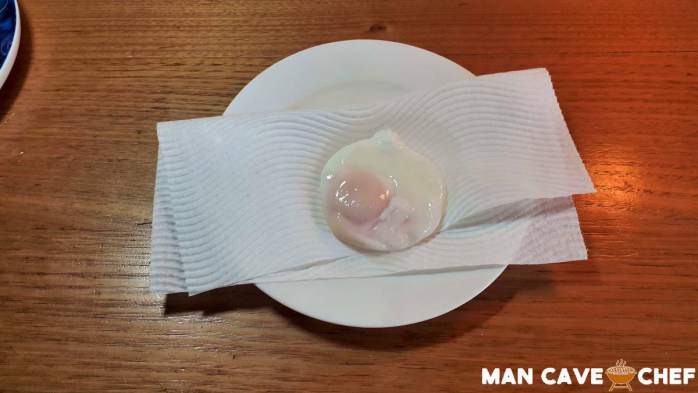
Look at how much water has been absorbed in the paper towel in the above photo. All of that water would have ended up on your toast if you skipped this step.
Once the paper towel absorbs the water, you can safely transfer the eggs to your nice and dry toast.
What doesn’t matter when poaching eggs
Some people may argue that the below things are important, but as you will see time and time again with cooking, a lot of misinformation gets passed around.
Swirling the water
The Vortex method (as explained later) is a popular way to poach eggs. It is meant to help the eggs stay in shape. But it isn’t necessary, doesn’t let you poach multiple eggs at the same time and easy to get wrong.
When my brother first heard I was spending the month working on mastering poached eggs, he was shocked to hear that there are other methods that don’t require swirling the water around. That’s how popular the vortex method is – many people think it’s the only way to poach eggs.
As you will learn later, there are a number of problems with the vortex method. In my search for a foolproof way to poach eggs, the vortex method creates too many issues compared to other methods.
You don’t need vinegar
As explained earlier, the idea with vinegar is that it is meant to help the proteins in the egg whites to coagulate. But during testing, I found it was far easier to achieve better results without the vinegar. Vinegar can lead to rubbery egg whites.
If you have old eggs, then vinegar can help to overcome the age of the eggs and help them set. But if you want good results, don’t use old eggs.
If you use fresh eggs (for the best results), vinegar isn’t necessary.
Salt in the water
Salt in the water isn’t necessary when poaching eggs. It doesn’t help them set any better than plain water and can potentially give your eggs a chalky texture.
You can use salt in the water if you like the way it changes the taste of your eggs, but if in doubt, just add salt to the eggs after removing them from the water.
Different Ways of Poaching Eggs
There are a number of different methods you can use to poach eggs. This is what causes some people confusion as different people swear by different methods.
For example, there’s a popular YouTube cooking channel and in one video they tell you that the vortex method is the best method, then another video by the same channel says the vortex method is overrated.
The truth is poaching eggs is simple if you understand the details of what you’re doing.
Over the last two months, I’ve spent a lot of time comparing different methods to poaching eggs. Let’s go through each method so you can get an idea of which method is best for you.
Then I’ll explain how you can poach multiple eggs at the same time for a large number of people (if you want to show off your poached eggs with a group).
The Vortex Method
The vortex method is the most popular method when poaching eggs. When most people think of poaching eggs, they usually visualize a swirling pot of water.
The basic idea behind this method is simple.
Swirling the water around creates a stable center that is meant to keep the egg in place. As you can see from the below diagram, the arrows in the center are much smaller than around the edge:
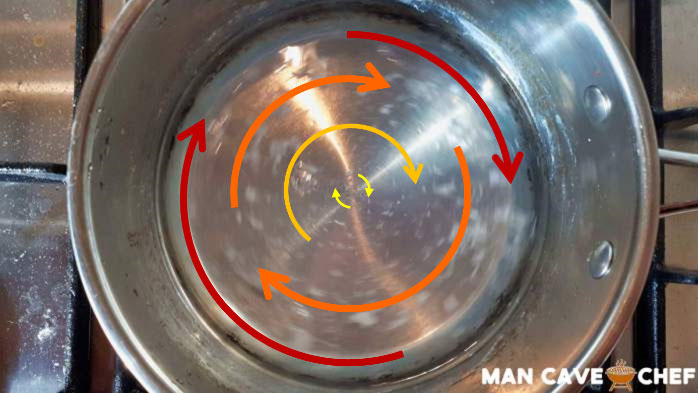
In the above photo, you can see blurry egg white bits spinning around the water. If you try this yourself, you’ll notice that anything in the center barely moves while everything else spins around rapidly with the water.
The idea is that if you add your egg to the center of this vortex, the spinning water will hold the egg in place and keep it together while it cooks.
The first time I tried this, the egg fell apart because the water was spinning too fast.
Every other time produced perfectly fine poached eggs as long as the water was swirling at just the right speed.
The key to success with this method is that you don’t want to agitate the eggs too much. If you swirl the water too fast, they’ll fall apart.
It’s also crucial that you drop the egg to the exact center of the vortex. If it is even slightly off-center, the egg will break apart in the spinning of the water.
Verdict: I do not recommend this method. While it can produce excellent poached eggs, the swirling is unnecessary. It limits you to only one egg at a time and can ruin the eggs if done incorrectly. When compared to other methods, this one feels pointless.
Poached Eggs in Cling Wrap
An interesting method I’ve seen other people use is to place the eggs in cling wrap (aka cling film, plastic wrap, Glad wrap, clear wrap), then use the cling wrap to keep the eggs in shape as they cook.
Start by taking a small cup or bowl and line it with cling wrap:
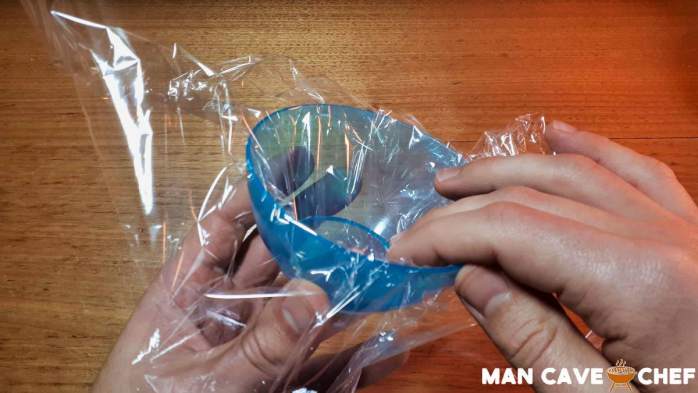
Make sure you have plenty of excess as shown above so you can easily pick up the eggs later on.
The first time I did this the eggs fell apart when trying to remove them from the cling wrap after cooking. To prevent this, you might want to lightly spray the cling wrap with oil before you add the eggs.
Now crack an egg into the bowl:
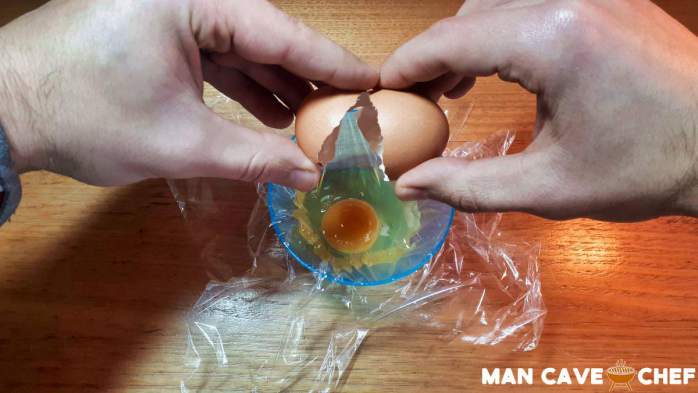
Extra tip: if you like the idea of an extra-large poached egg, you can crack two eggs into the one bowl. They will cook together and you’ll end up with a double-yolker!
Carefully pick up the cling wrap so the egg stays together in the center:
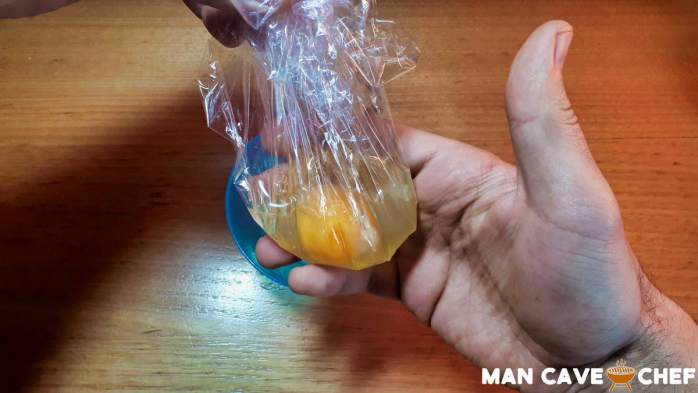
Twist the cling wrap just above the egg and push out as much air as possible until you have a fairly tight package as shown below:
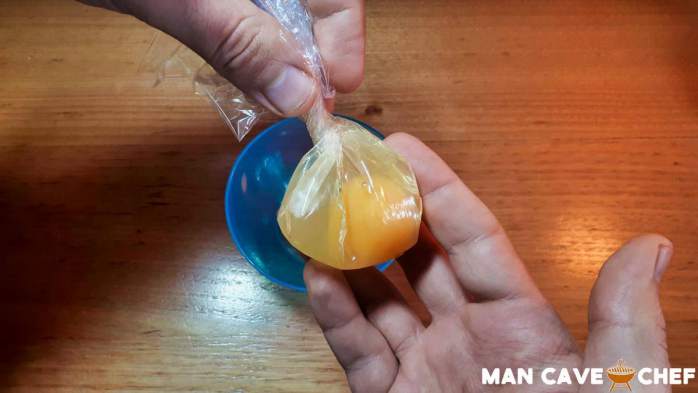
Removing the air is important as it will affect the way the eggs cook.
Now when you bring the water to the correct temperature, you simply lower the cling wrap package into the water:
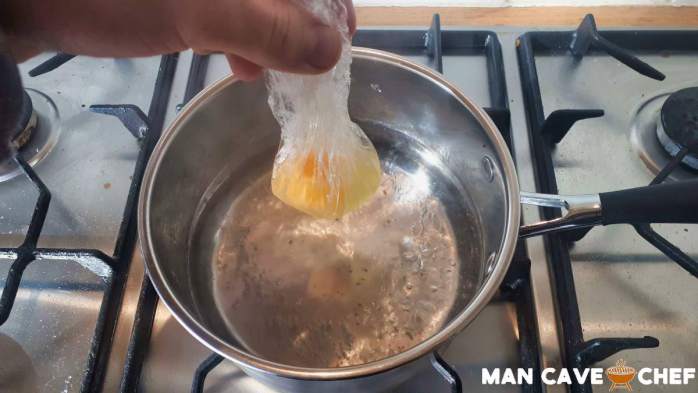
With this method, you can easily poach multiple eggs at the same time. The water will stay 100% clear as the cling wrap holds everything in place.
You’ll gradually notice the eggs turn white and can easily tell when they’re ready to remove based on how firm the package is.
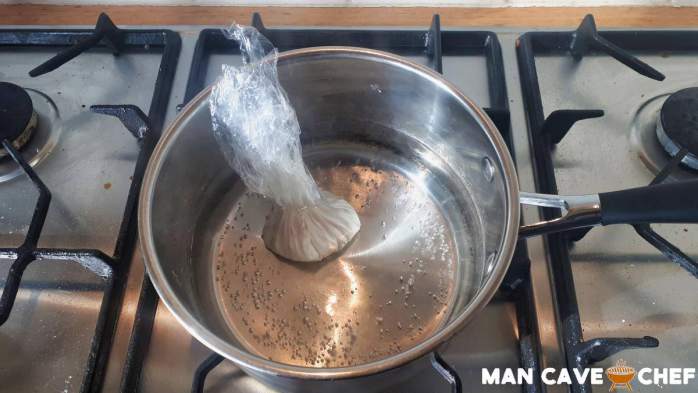
After removing the cooked eggs from the water, you simply remove the cling wrap to reveal a tightly-packed poached egg:
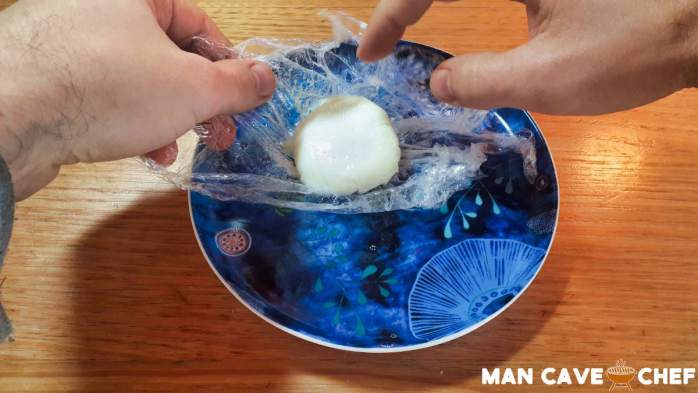
The shape of the egg looks weird when compared to other methods as you will see the wrinkles from the cling wrap in the egg.
The shape of the poached egg depends on how tightly you wrap the egg in cling wrap. You can achieve anything from a ball shape like in the above photo to a more traditional poached egg shape.
Verdict: this method is pretty easy as you don’t need to worry about the egg falling apart in the water. The downside is you end up with an oddly shaped egg with weird wrinkles.
Using a Cup
If you’re experienced with cracking eggs and can easily crack them every time without eggshell falling away with the egg, then the simplest way of adding eggs to the water is to crack them directly into the pot.
If you’re not as confident with your egg cracking skills, the foolproof method is to crack an egg into a bowl, then simply use the bowl to gently lower the egg into the water.
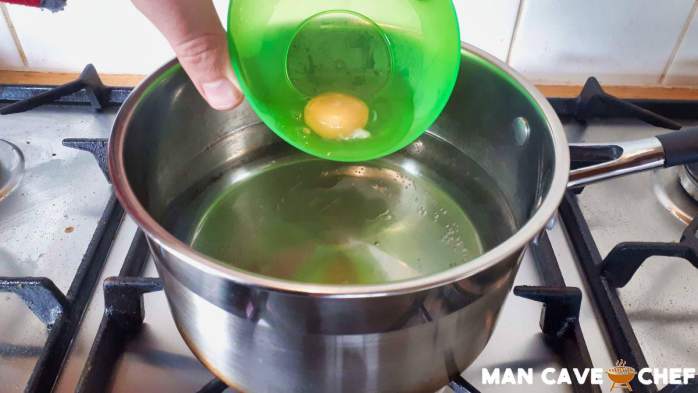
The advantage of this method is that you can use the bowl to get right up to the water and allow the egg to gently slide into the water.
This helps the egg stay in shape as it enters the water as you can see in the below photo:
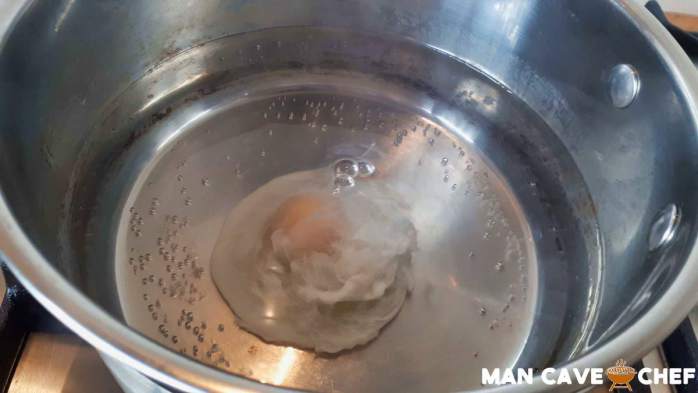
The egg has slightly spread out as you would expect, but it has held its shape perfectly.
Notice that the low temperature of the water also prevents the egg from getting agitated. If the water temperature was higher, the agitation would bounce the egg around as it cooks and it may ruin the shape.
Once the egg starts to turn white and hold shape, you can easily raise the temperature if it is taking too long. The point is that a lower temperature helps the egg stay in shape.
When the vortex method is used, the swirling water keeps the egg moving and prevents it from overcooking on one side. With this method, we need to make sure the bottom of the egg doesn’t overcook.
Use a slotted spoon (or anything similar) to gently move the egg around and flip it over as you see fit.
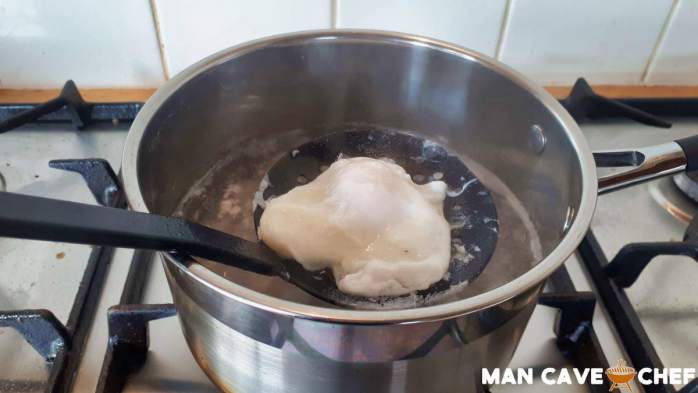
As you can see, you don’t need to swirl the water to poach an egg. It’s perfectly fine to crack the egg or use a cup to add the egg directly into the water.
Verdict: using a cup gives you full control over how you add the egg to the water. You need to pay closer attention to the egg when it is in the water, but it’s hard to mess up this method.
Straining the Egg (Recommended method)
Now let’s look at the method I highly recommend for best results. While this method does involve an extra step that you skip by cracking the egg directly into the water, it produces far better results.
The idea behind this method is to use a fine strainer to strain the watery part of the egg whites before you add the egg to the water.
The watery part of the egg white is what causes all the little stringy bits you might have noticed in the above photo.
By removing this watery part of the egg white before we add the egg to the water, we end up with cleaner water (handy when poaching multiple eggs) and a nicer end result.
Simply take a sieve and place it over a bowl. Crack an egg into the strainer:
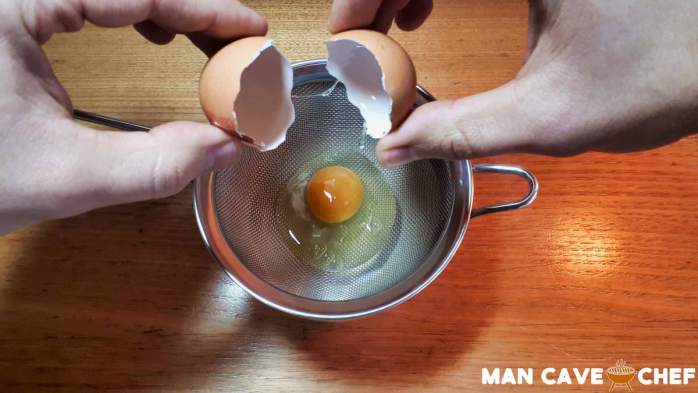
Gently swirl the strainer around and you will notice liquid pass through the strainer as shown below:
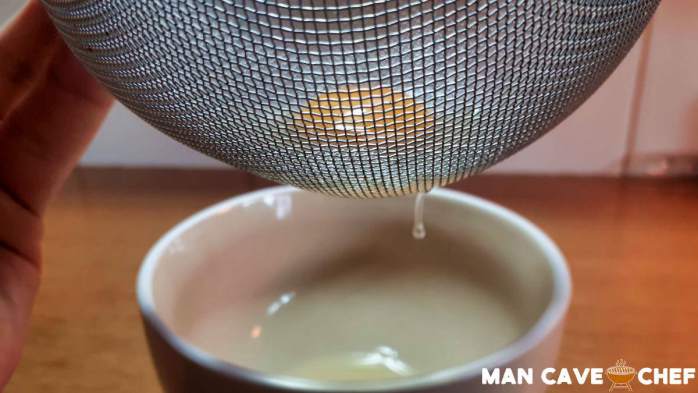
Remember that this is the liquid that turns into the stringy parts. The important part of the egg white will stay in the strainer.
Here’s how much liquid was removed from this egg:
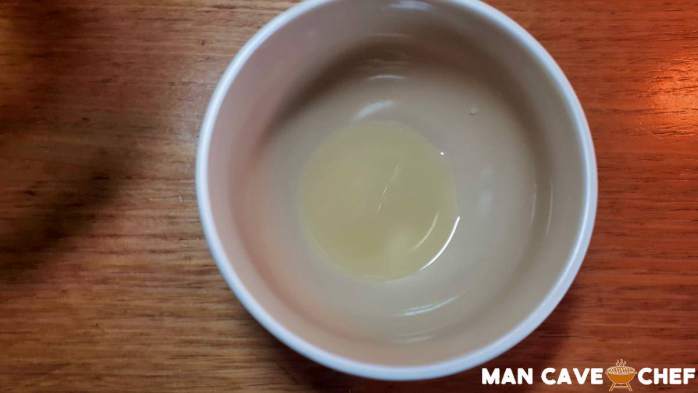
It might not seem like much, but removing this liquid makes your job a lot easier.
To show how foolproof this method is, I’ll show you photos of one attempt where I accidentally broke the yolk when I cracked the egg into the strainer.
As you will see, this method is gentle enough for the broken yolk to no affect the end result in any way.
Once you strain your egg, you can use the strainer to gently lower and slide the egg into the water:
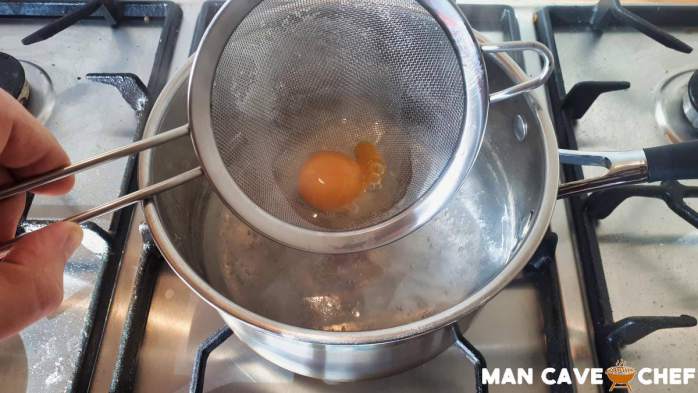
You can see the broken yolk in the above photo and how gently lowering the egg using the sieve keeps everything intact.
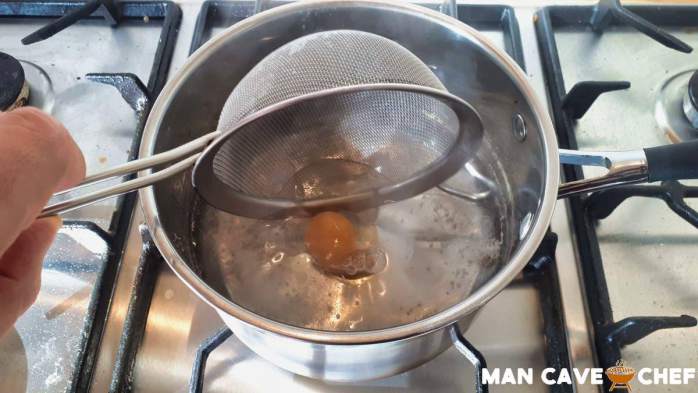
Once the egg starts to turn white, use a slotted spoon or anything similar to gently move the egg around.
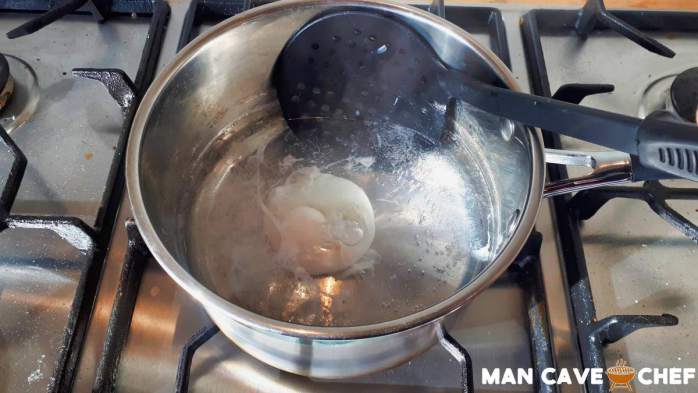
The white stringy bits you see in the above photo were from a previous egg not using a sieve. If you use a sieve, you won’t have any stringy bits in the water as you cook your eggs.
As you can see from the below photo, this method and the low temperature produced a nicely shaped and smooth poached egg.
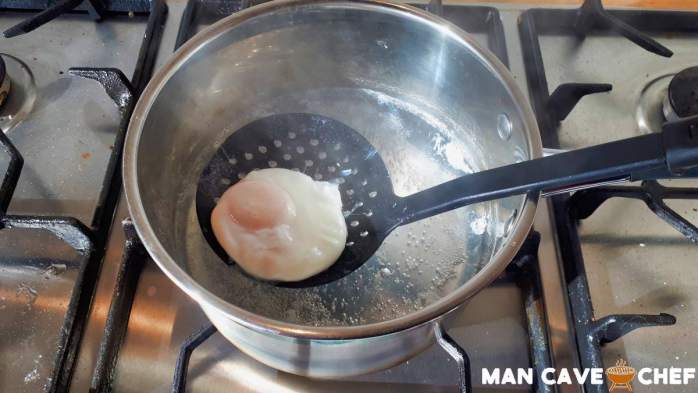
The method is so foolproof it worked with the broken yolk from this example. Compare the shape of this poached egg to the earlier example and it should be clear why this method is considered foolproof.
After placing the egg on a paper towel to remove the excess water, here’s the end result:
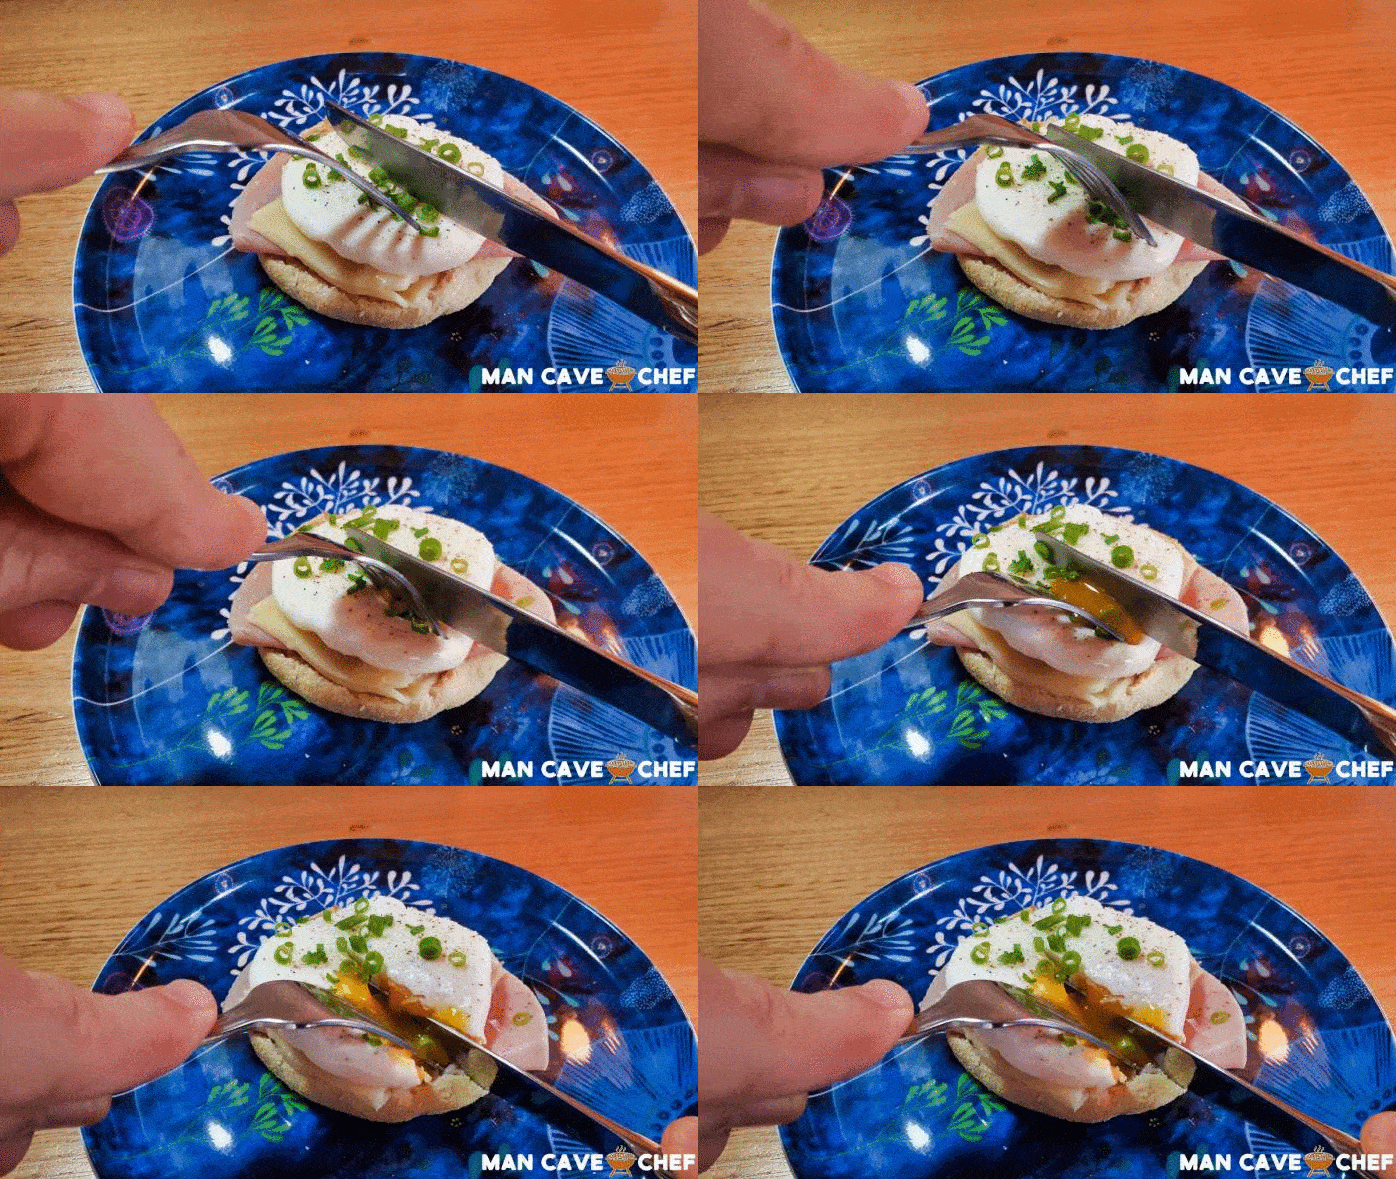
A perfectly poached egg without the stringy bits you would get in other methods.
Verdict: this method is basically foolproof. While experienced chefs will say that straining the egg is unnecessary and you could simply cut the stringy bits off after cooking, I find this method produces the best results.
The only downside is if you want to poach multiple eggs at the same time. You’ll need to quickly strain each egg one after the other as you add them to the water.
