If you’re looking for a way to elevate your burger game, this burger bun recipe is for you.
A good hamburger is always a crowd-pleaser and adding homemade burger buns can completely step-up the overall quality of your burgers.
While you probably won’t want to make your own buns when cooking burgers for 20+ people, they’re worth the effort when cooking for a smaller number of people (this recipe makes 8 burger buns).
This recipe will give you an easy method to produce soft and tasty burger buns. I’ll also explain how to modify the recipe to suit your preferences.

Try combining these burger buns with my Ultimate Smashed Burger Recipe here. If you’ve never tried making smashed burgers before, you’ll be surprised by how easy and tasty they can be.
Burger Buns Equipment and Tips
Before we get started, here are a few tips on equipment and ingredients to make sure you get the best results possible
Use a stand mixer
I highly recommend using a stand mixer with a hook attachment for this recipe. While you could knead the dough by hand, it’s going to be a lot easier using a stand mixer.
The dough for a good burger bun will be far stickier than doughs for other recipes to give it a nice and soft inside texture. If you dry the dough out too much as you would for pizza dough, it will be easier to knead by hand, but you’ll end up with a tough and chewy bun – not good.
Instant or Active Dry Yeast
I use instant yeast in this recipe, but you can substitute it for active dry yeast if that is all you have. I prefer instant yeast because you don’t need to wait for the yeast to proof.
If you use active dry yeast, use the same quantity but let it sit in the liquid until it becomes foamy before you start mixing. This can take 10-15 minutes.
Bread flour vs Plain Flour (All-Purpose Flour)
Bread flour is used in this recipe and has a crucial role in developing your burger buns. While you could use all-purpose flour instead, don’t expect great results.
Bread flour is high in protein which helps develop the gluten matrix that gives the bun structure. It’s important to understand that this recipe adds ingredients that inhibit the development of gluten (mainly the egg, sugar, and butter). So having extra protein to assist in gluten development is crucial.
How to control the bun’s density
The density of the bun is important to get right. If the bun is too dense, it might become chewy and you’ll feel like you’re eating a big loaf of bread instead of a hamburger.
You can control the density of the bun by how sticky/dry the dough is. The drier the dough (by adding more flour), the denser the bun will be.
That is why this recipe tries to lean towards a stickier dough. It will be annoying to handle, but you’ll end up with a softer and fluffier inside that works great as a burger bun.
If the dough seems impossibly sticky in the beginning – don’t add extra flour in yet! As the dough is kneaded and begins to rise, the stickiness will gradually reduce. Give it time and to rise and only resort to adding more flour if it isn’t forming.
How to Make Hamburger Buns Step by Step
Get all your ingredients ready and set up your stand mixer.
Start by heating up the water until it is warm (or use warm tap water) and add it to the bowl. Don’t use cold water or it will inhibit the yeast.
Add the milk, egg, and sugar into the mixer bowl. Add the yeast to the bowl and if you’re using active dry yeast, let it sit for around 10 minutes.
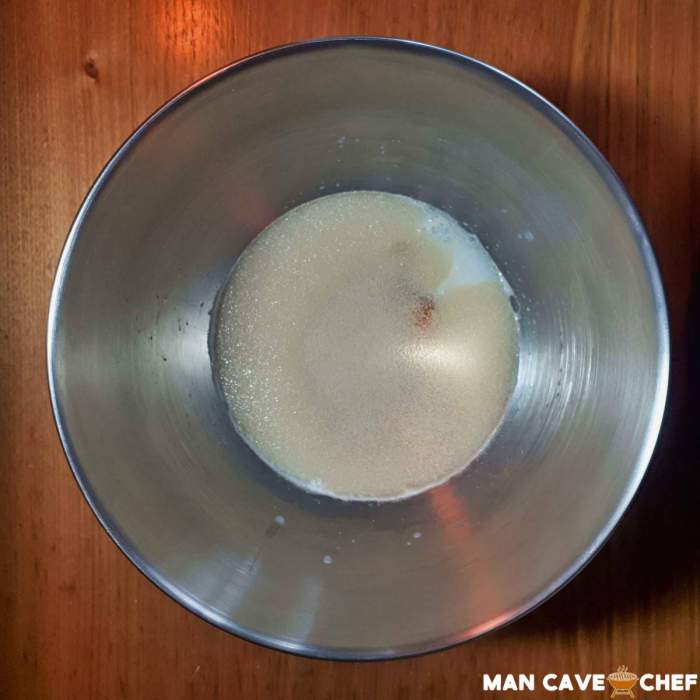
Stir the ingredients to break up the egg and loosely mix everything before you turn on the mixer (the hook will do a lousy job at mixing the egg).
Start the mixer at a slow speed and measure your flour using a scale.
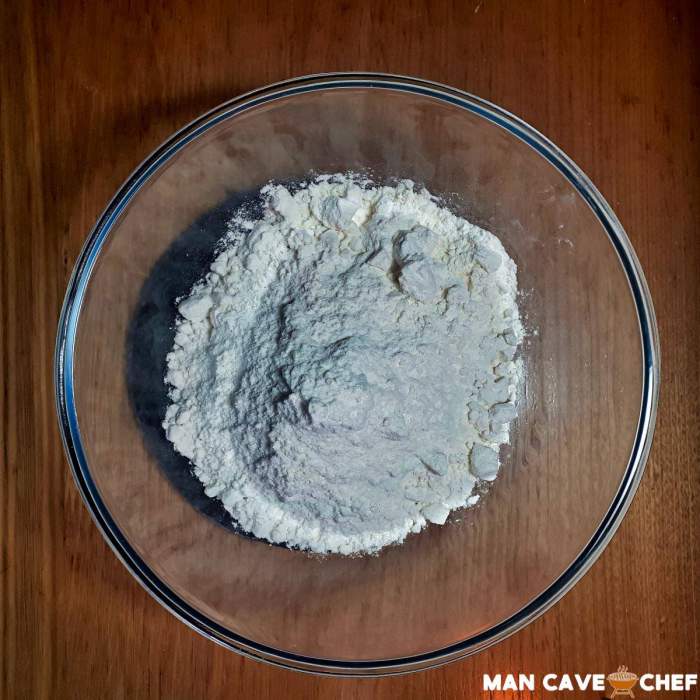
When baking, always weigh ingredients instead of using measuring cups. Using scales will ensure you get consistent results every time. Using measuring cups can significantly change your results that can ruin your buns.
Gradually add the flour into the mixer to give it time to slowly combine the flour.
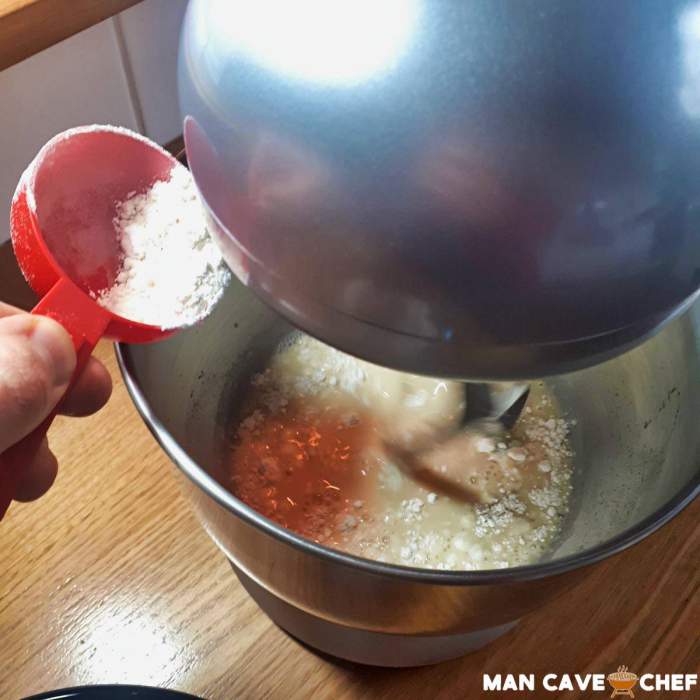
Use room temperature butter or warm it up slightly in a microwave to ensure it can easily break up when you add it to the mixer.
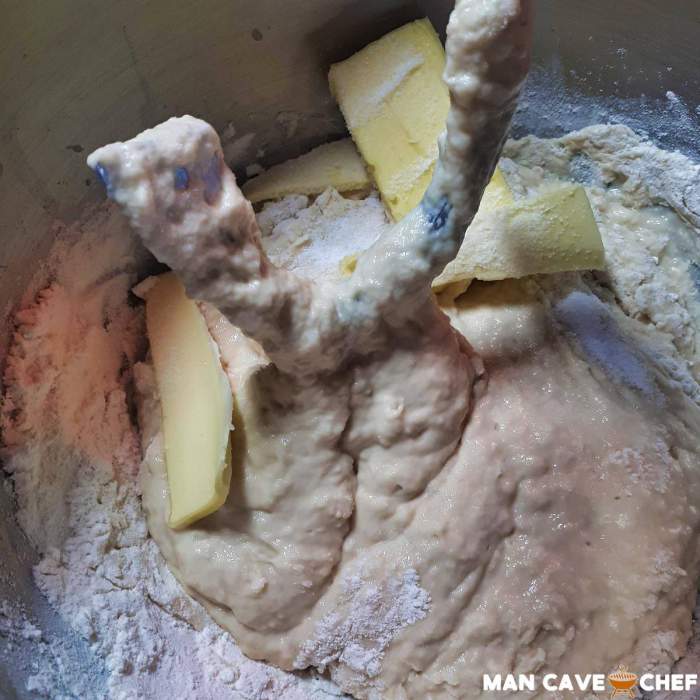
After what will seem like forever of a sticky mass not forming together, you should gradually start seeing it take some shape as shown below:
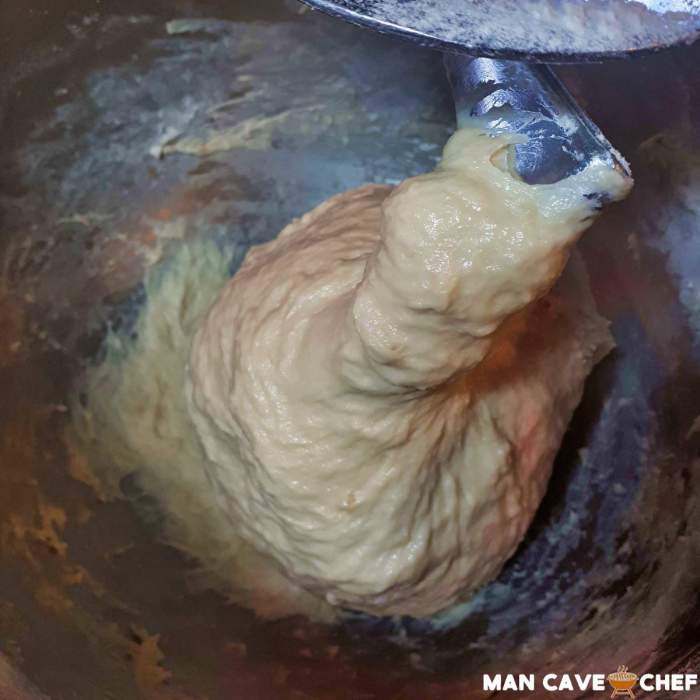
Remember that a stickier dough gives a lighter and fluffier bun, so avoid the temptation of adding more flour to dry it out. Unless you want a dense and chewy bun.
When the dough starts holding shape on the hook, transfer it to a lightly oiled bowl.
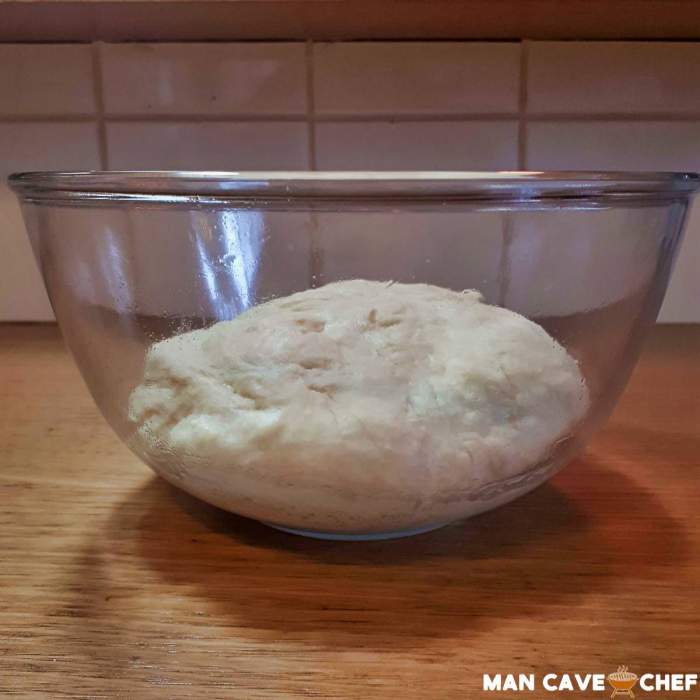
Lightly oiling the bowl makes it easier to remove the dough later on.
Make sure the bowl you choose has enough room for the dough to double or triple in size.
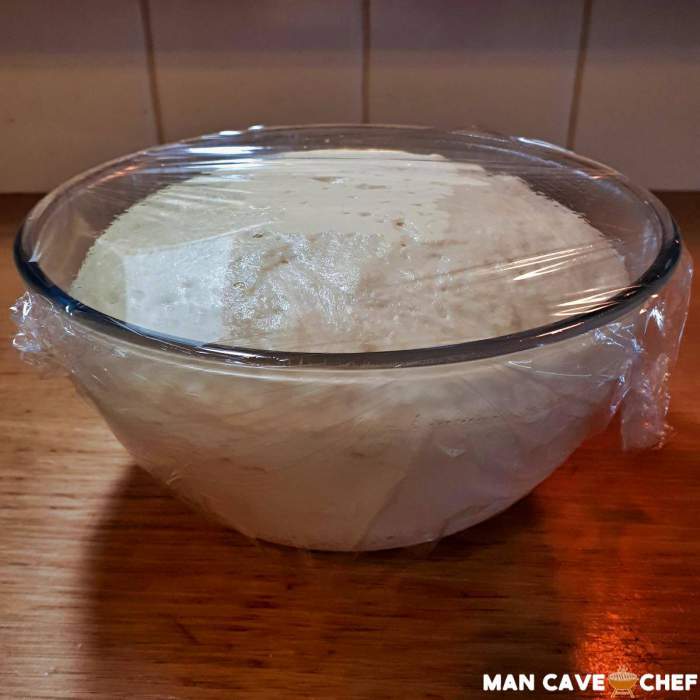
Place some cling wrap over the bowl and let it rise for two hours.
After about two hours, the dough should double in size. As you can see, the bowl I chose wasn’t quite big enough.
Gently transfer the dough to a lightly floured surface and cut it into eight pieces (this recipe is perfect for eight buns). I’m preparing four here and placed the remaining dough in the fridge to continue to proof overnight (find out why later on).
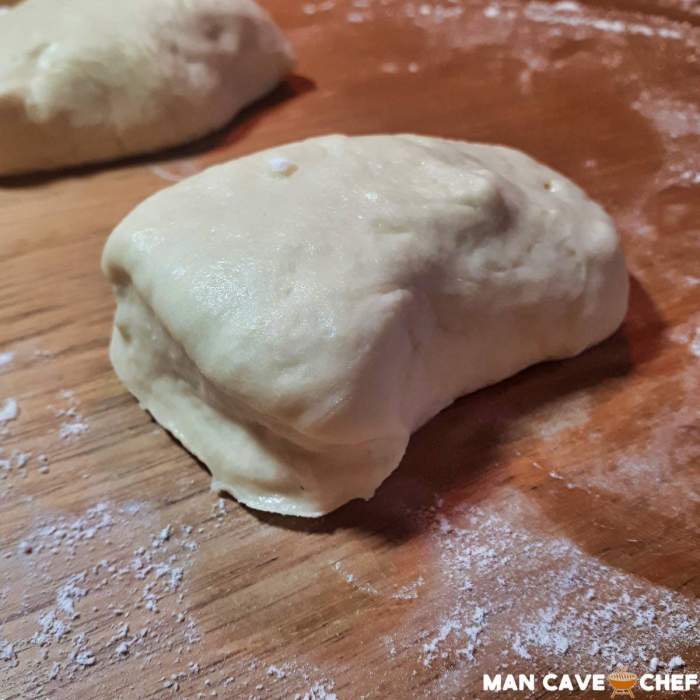
The dough will still be quite sticky, so make sure your hands are well floured and you move quickly when handling the dough.
Take one piece of the dough and form it into a nice round ball.
The easiest way to do this is to first shape it into a ball, then continuously turn the ball in on itself by pushing the outside edge towards the center as shown below:
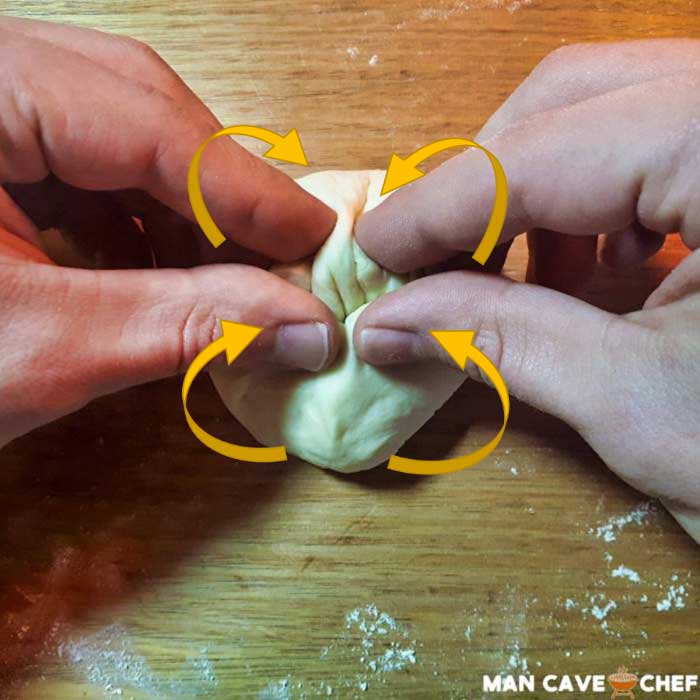
It might look like a mess while you’re doing it, but when you flip the dough over, you’ll see a nice smooth and round bun:
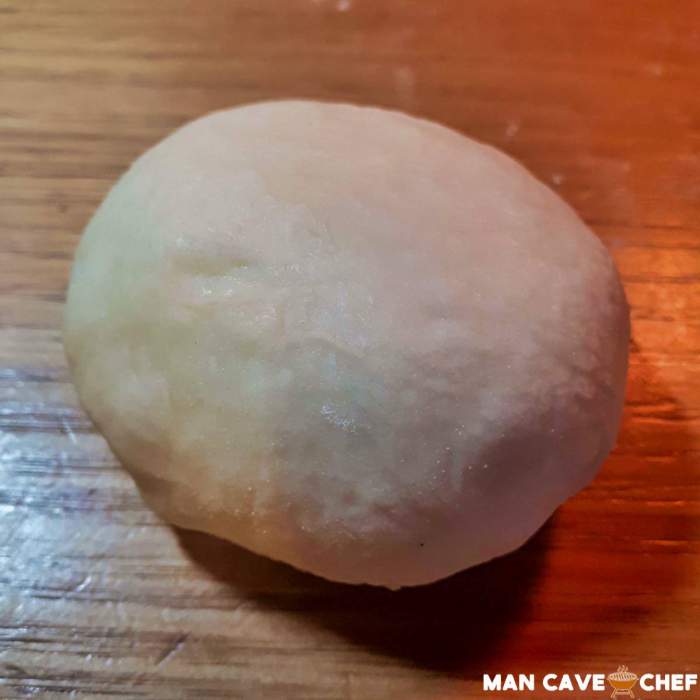
As the burger bun rises in your oven, the bottom will flatten out so you don’t need to worry about getting it perfectly smooth.
Place your buns on a baking tray lined with baking paper and leave plenty of room between each bun.
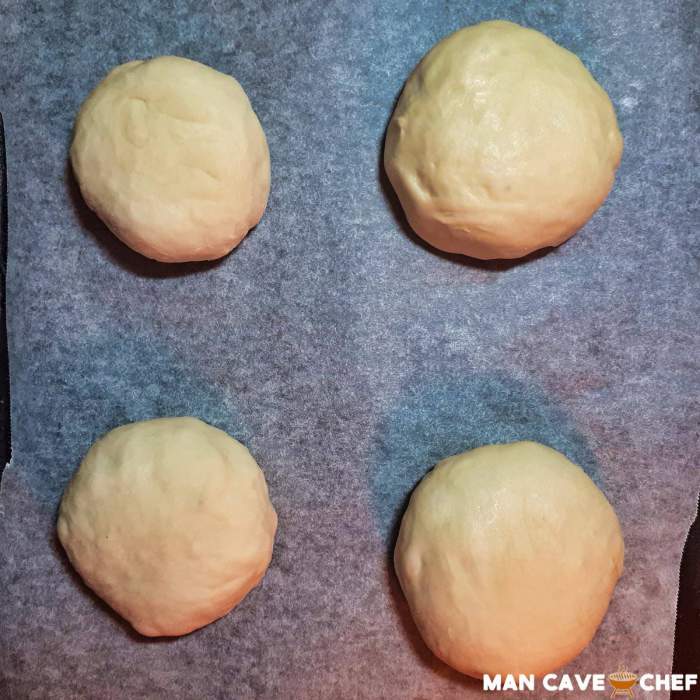
Cover the tray and leave to rise for 60-90 minutes.
If you were to bake these now, you would end up with a lightly colored bun. If you like the idea of having a golden brown bun, there are a few ways you can achieve this.
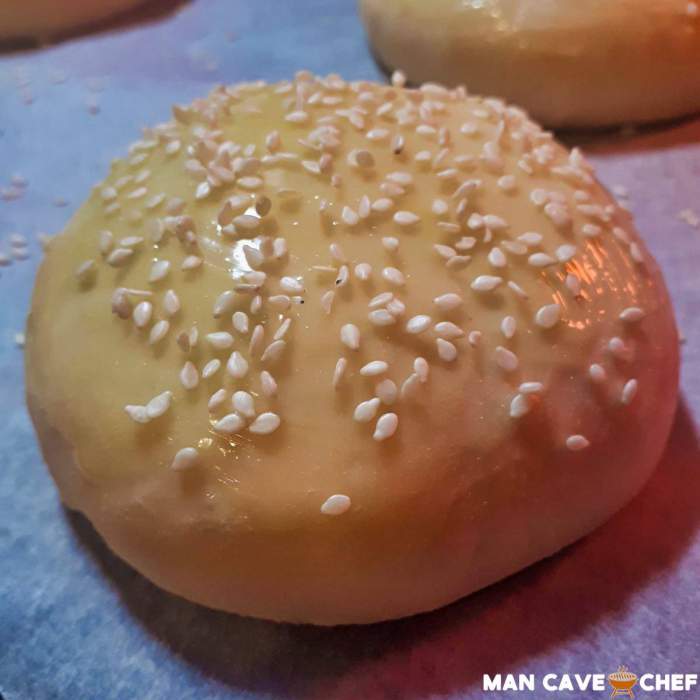
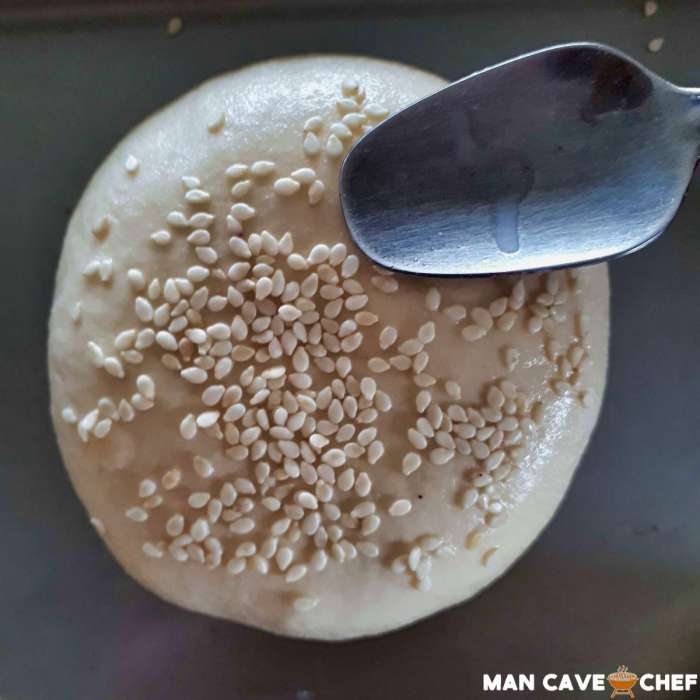
In this batch, I melted some butter and brushed it over the top of each bun.
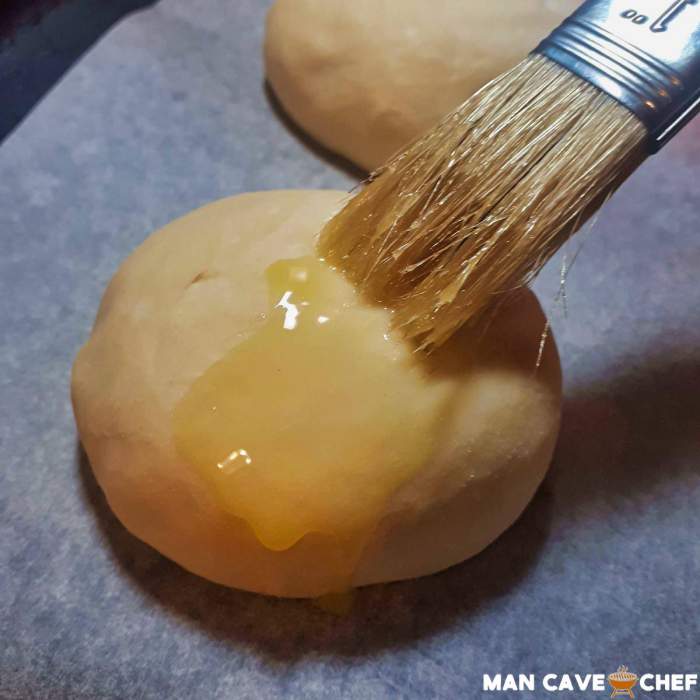
The butter helps give the buns a golden brown finish as it bakes. If you want to add sesame seeds to your buns, the butter will also hold them in place.
An alternative to melted butter is to beat an egg and brush it on the buns.
Another good alternative (and quicker than beating an egg or melting butter) I tested on the second-day batch is to mix some baking soda and water together. Brush that solution over the buns and it will also give the buns a golden brown finish.
With the second-day batch, I also used the back of a spoon to lightly press the sesame seeds into the buns to make sure they hold in place after baking. This helps prevent them from falling off (which is what happened while eating the burgers from the first-day batch).
The baking soda and water help brown the buns due to the alkalinity of the baking soda. This is a trick I learned after making traditional pretzels. Pretzel recipes use a lye bath (highly alkaline) to give the pretzels a nice brown color. You can get similar results with baking soda and water.
Preheat your oven to 400°F (204°C) and place the buns in for 12 minutes.
After 12 minutes, take a look at your buns and decide whether you’re happy with the texture and color. At this point, they should be fairly soft and light in color. Leave them in for another 5 minutes and they’ll gradually become browner and develop a harder outside shell.
Here are my burger buns after 15 minutes:
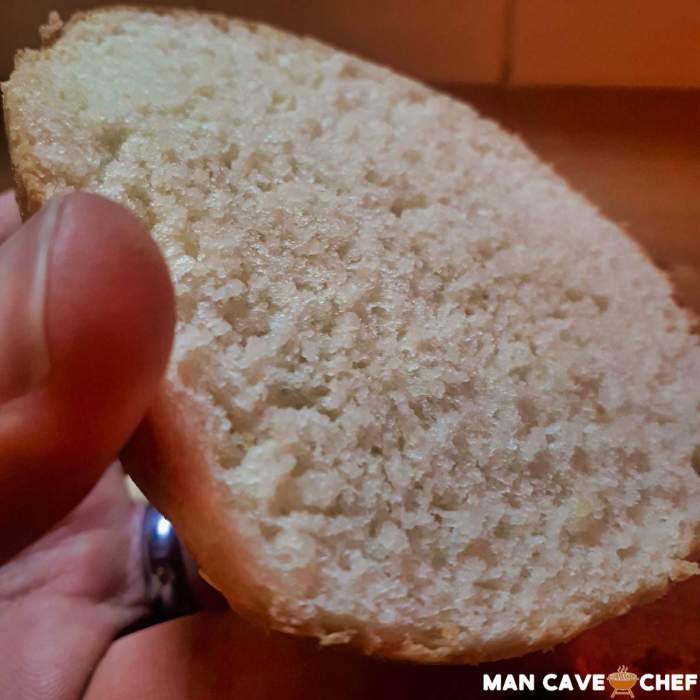
They had a nice and brown outside shell while the inside was light and fluffy.
After you finish your first attempt at burger buns, think about what you might change next time.
Maybe you will add less flour next time to give it a fluffier texture. Or maybe you’ll try and spread the dough out more to have a wider bun.
I’ve explained how this recipe works, so play around with the different controls (eg: flour quantity, oven time) until you work out what your ideal burger bun looks like.
Cold-proofing Burger Buns
In the above step-by-step recipe, I only made four buns from the dough and placed the rest of the dough in the fridge. I did this to test whether cold-proofing produces better burger buns or not.
‘Cold-proofing’ is when you place the dough in a fridge to slowly rise instead of out in a warm space to quickly rise.
Cold-proofing is the secret weapon when creating pizza dough, but I wanted to see how it changes burger buns. I let the dough rise at room temperature for the first two hours, then placed half of the dough in the fridge for 24 hours.
The differences between the buns on the first day (normal proofing) to the second day (cold-proofing) were obvious to everybody who tried them.
The first-day burger buns were light in flavor and extremely soft in texture on the inside.
The second-day burger buns had a significantly stronger flavor, were slightly denser, and preferred by everyone who tried both batches.
If you have any extra dough leftover after making your buns, I highly recommend placing it in your fridge and let it cold-proof overnight. Then bake the bun so you can see how cold-proofing changes the flavor and texture.
You may prefer cold-proofed buns or you may feel it isn’t worth the extra time to prepare. But it’s a quick and easy way to see what all the fuss is about. While you may want to give cold-proofing a miss for burger buns, I highly recommend it for pizza dough.
Printable Recipe Card
Once you’ve read through the above detailed step-by-step instructions, use the below recipe card for a quick reference.
You can print the card out if you need a quick and easy reference sheet while making your burger buns in the future.
Easy Hamburger Buns
These simple hamburger buns will give your burgers extra flavor and better texture over store-bought buns.
Ingredients
- 3 tbsp Whole Milk
- 1 cup Warm Water
- 1 Large Egg
- 1 packet (2 tsp) Instant Yeast
- 2 tbsp Sugar
- 400g Bread Flour
- 50g All-Purpose Flour
- 2 tsp Salt
- 45g Unsalted Butter
- Sesame seeds (optional topping)
Instructions
- Add the milk, egg, sugar, and yeast into the mixer bowl with hook attachment
- Set mixer to slow speed and gradually add flour
- Add warm butter to mixer and turn up speed to medium
- Let dough knead until it holds together on hook
- Transfer sticky dough to lightly oiled bowl
- Cover and let dough rise for two hours
- Cut dough into 8 equal parts on lightly floured surface
- Form round balls to suit the style of burger you're making
- Place on a baking tray lined with baking paper
- Brush with optional butter/egg/baking soda and add sesame seeds
- Cover tray and let rise for 60-90 minutes
- Preheat oven to 400°F (204°C)
- Add tray to oven for 12-15 minutes depending on how soft/crunch you want your buns
Notes
- Highly recommend using a stand mixer instead of kneading the dough by hand
- Instant yeast and active dry yeast are interchangeable. If using active dry yeast, let it sit for 10 minutes before you turn the mixer on
- The melted butter/egg/baking soda solution is to help the sesame seeds stick and assists with browning the buns. It's completely optional
- The sticker the dough, the fluffier the end result will be. Avoid adding extra flour into the dough or you risk the buns becoming dense and chewy
Nutrition Information:
Yield: 8 Serving Size: 1Amount Per Serving: Calories: 290Total Fat: 8gSaturated Fat: 4gTrans Fat: 0gUnsaturated Fat: 4gCholesterol: 36mgSodium: 596mgCarbohydrates: 46gFiber: 2gSugar: 4gProtein: 8g
Check out my Ultimate Smashed Burger Guide for a quick and delicious way to make some smashed burgers to go along with these burger buns.